The Problem.
For teamsites and collaborations, sometimes it can be useful to upload big file size documents – which is allowed only partially by SharePoint and IIS. They both have different default settings for the maximum upload file size of a single document or file. They are:
- SharePoint Server 2010: 50 MB
- IIS7: ~30 MB
So, when trying to upload a big document, this results in the following error:

85 MB is simply too much for the above mentioned settings. Now, the solution section will show you how to fix this.
The Solution.
The good news is: This can be custom tailored to your needs, by simply following 3 steps. Here comes the first step:
1. Increase the SharePoint Upload Limit via Central Administration
First, you must increase the SharePoint 2010 upload limit.
- Central Administration
- “Manage Web Applications”
- Select desired web application row (don’t click on the title, just select)
- “General Settings” in the ribbon
- Under Maximum Upload Size, change the setting to the desired value (e.g. 200 MB in our example)
- “OK”

Now, the web app is equipped for receiving large files, but IIS7 will still prohibit it, resulting in the same error message as above. So, let’s move on to step 2.
2. Increase the IIS7 request length
Use the following command on the machine you are running the IIS 7:
%windir%\system32\inetsrv\appcmd set config -section:requestFiltering -requestLimits.maxAllowedContentLength:valueInBytes
In our case, we’ll simply put 200x1024x1024=209715200 bytes.
You will receive a confirmation message after applying the command. Please bear in mind that you will need to run the cmd.exe in administrator mode.

3. Increase the IIS7 connection timeout length (optional)
One more thing to keep in mind is the connection timeout settings: When you upload large files, depending on your connection speed it can happen that the connection times out. If you want, you can increase the connection timeout to a larger value. The standard is 120 seconds. This step is optional, but can become required if you have users with low speed internet connections.

- Open IIS
- Select the Web Application
- Click on Advanced Settings
- Expand Connection Limits
- Set the new value for Connection Time-out (seconds)
This is it – all done!
You users will now be able to upload larger files:

As usual, test any commands, configuration and settings on a test environment before applying them in production. Applying request lengths bears also some security implications to keep in mind. Use any advices and configurations at your own risk and evaluate risks before applying them.
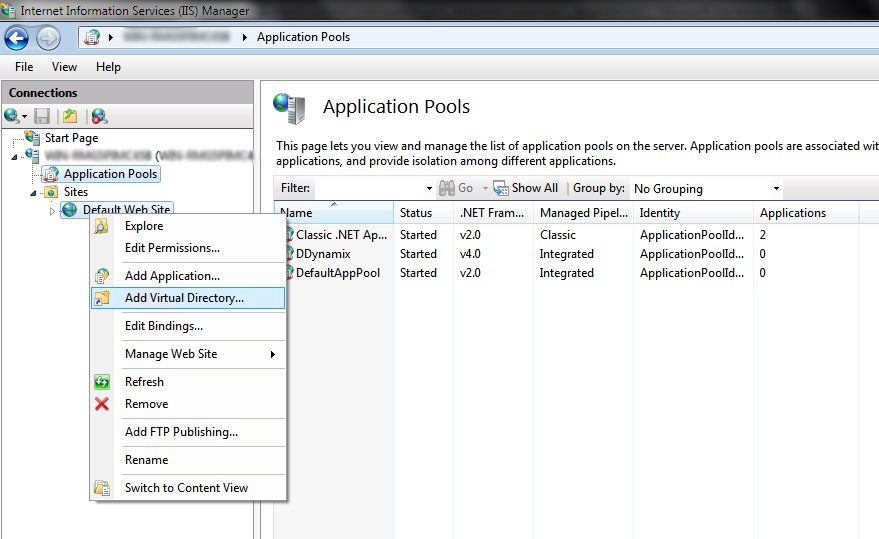 Now type in an alias (it will appear as localhost/(youralias)
when browsing), then select the actual path of your website. It is
highly recommended to keep all hosted websites within one folder located
in C:\ (e.g. C:\Websites\Website1). This way, some privilege issues will not occur when running the application on a Windows 7/2008 R2 machine.
Now type in an alias (it will appear as localhost/(youralias)
when browsing), then select the actual path of your website. It is
highly recommended to keep all hosted websites within one folder located
in C:\ (e.g. C:\Websites\Website1). This way, some privilege issues will not occur when running the application on a Windows 7/2008 R2 machine.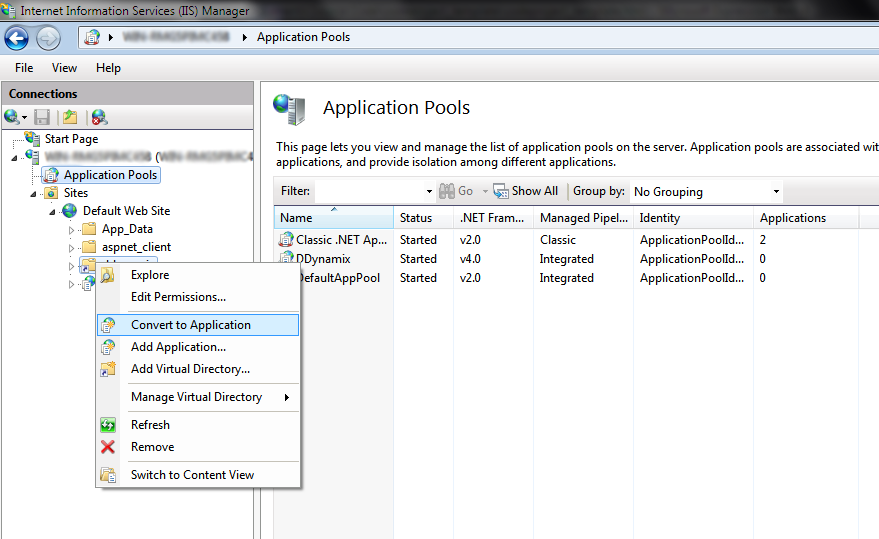
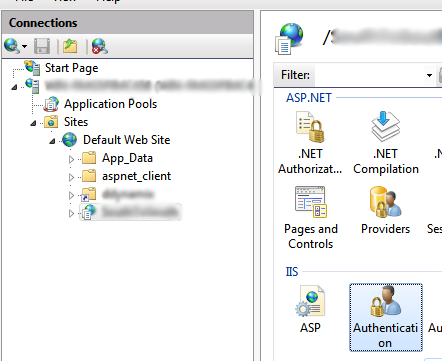 Click on your website in the connections view. On the right-hand
side, a page will open presenting you with a lot of options. In the IIS section, double-click on Authentication.
Click on your website in the connections view. On the right-hand
side, a page will open presenting you with a lot of options. In the IIS section, double-click on Authentication.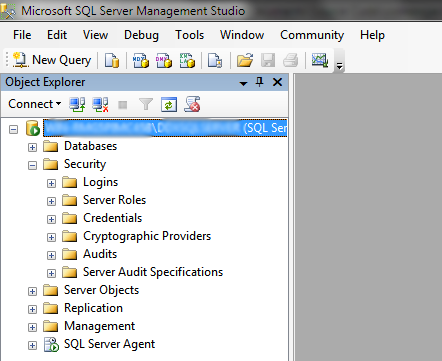 Right-click on Logins and select New Login. In the dialog that just opened, click Search. Within the Object Search dialog, select Advanced. Now click Find Now.
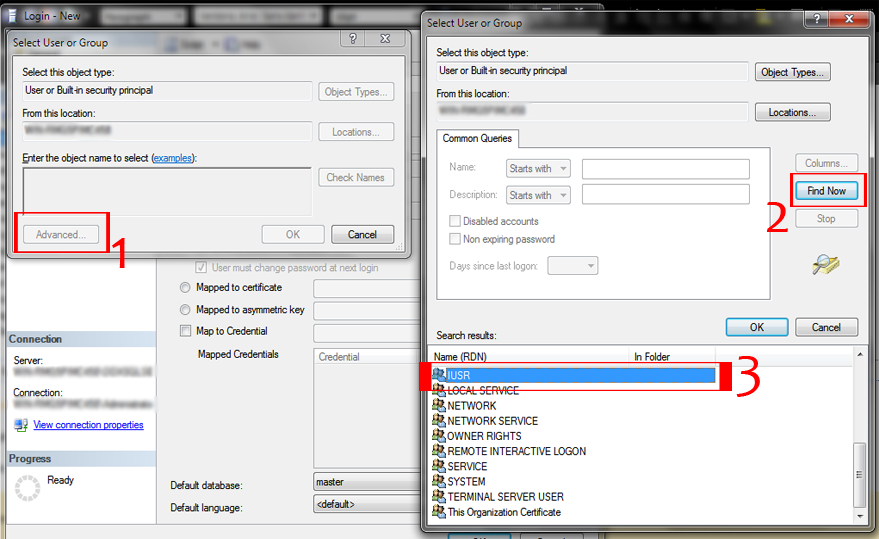 Select IUSR and click OK. Click OK once again. If, at the end of this article, you still experience SQL Login problems, try adding more Server Roles in the Server Roles tab.