Virtualize a Windows system with VMware vCenter Converter
August 17th, 2009 by Luis VenturaThe title should have been transition from bare metal to virtual with VMware vCenter Converter. VMware foresaw the existence of server configurations that were either too complex or labor intensive to be recreated from scratch, that’s why they came up with VMware vCenter Converter. What it does is convert a bare-metal system in to a VMware virtual machine ready to be used.
- VMware vCenter Converter is available for free from the VMware website.
- Keep in mind you will need another drive or remote storage to store the new virtual machine.
How-To
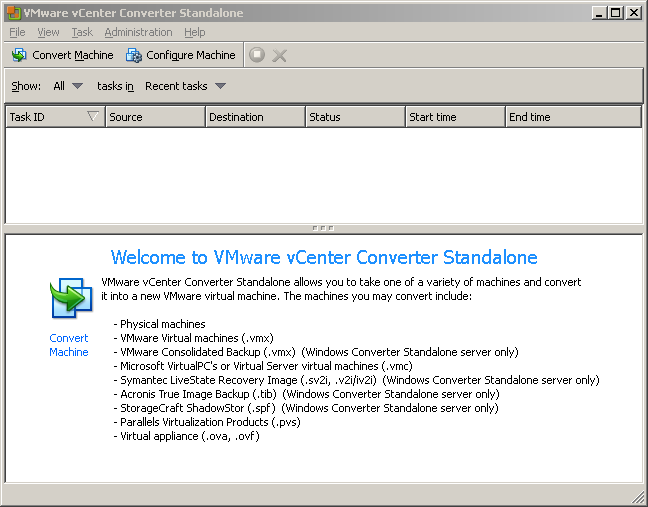
- Start VMware vCenter Converter and click on Convert Machine.
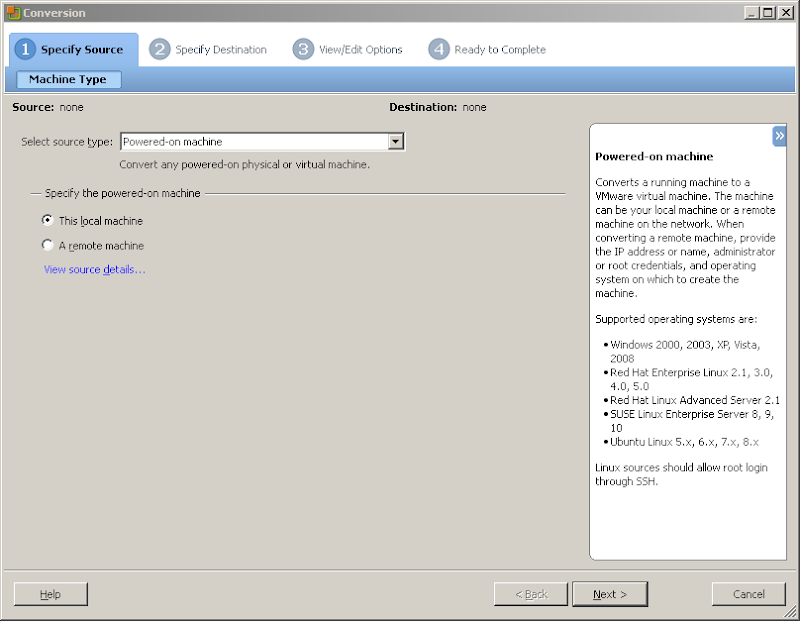
- Select source type: – This is where you get to choose the system you wish to convert. I choose Powered-on machine, to convert the local system.
- Specify the powered-on machine – Obviously, select This local machine.
In this window you will need to provide the following:
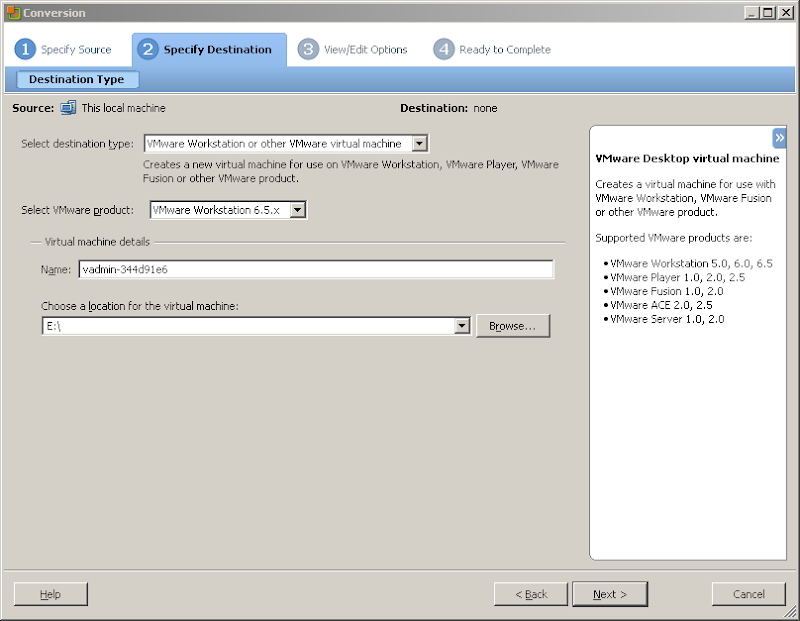
- Select destination type – this option will create a virtual machine for use on VMware virtual infrastructure virtual machine or VMware Workstion or other VMware virtual machine.
- Select VMware Product – Because I selected VMware Workstion or other VMware virtual machine in the option above, I have to specify the version of Vmware Workstation the virtual machine will be compatible with.
- Name: – Give a name to the virtual machine or use the suggested one.
- Choose a location for the virtual machine – Select the location where VMware Converter can output the new virtual machine to be created.
- And then hit Next to continue.
Remember, you need a second disk where VMware Converter can output the virtual machine while it’s being created. You can not use the same disk you wish to virtualize to stored the vm.
- In this windows you can change some aspect of the future virtual machine. Among the possible changes you can change: the allocated RAM, number of processors, and number of NICs. If you do not wish to make any changes hit Next to continue.
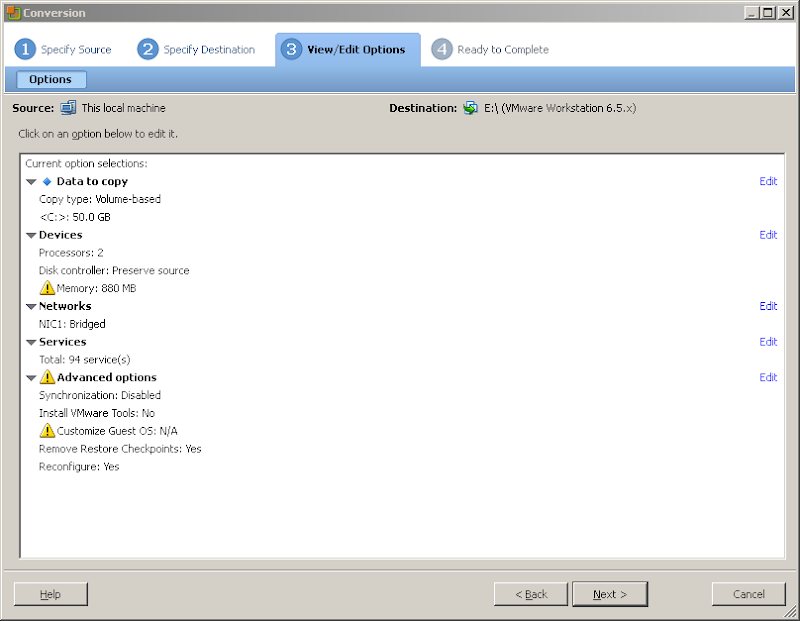
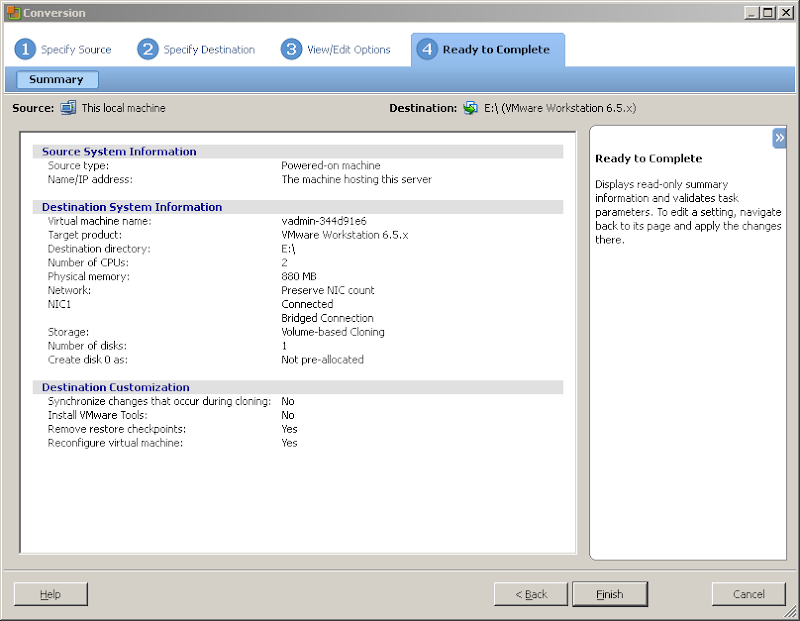
- VMware vCenter Converter will present with an overview of the setting for the new virtual machine.
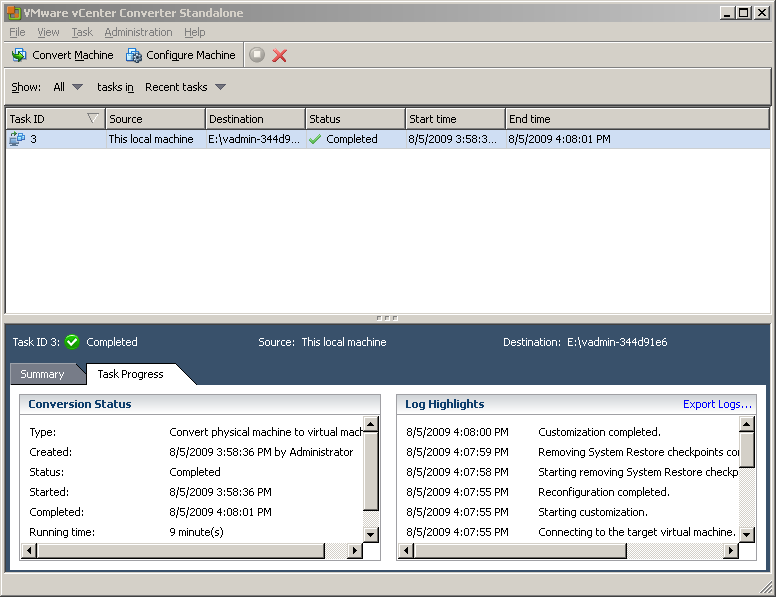
- VMware Converter will present you with a display of the progress being made. Allow for a considerable amount of time for the conversion to complete.
- After the process is done check on the drive or location where virtual machine was to be stored during the process.
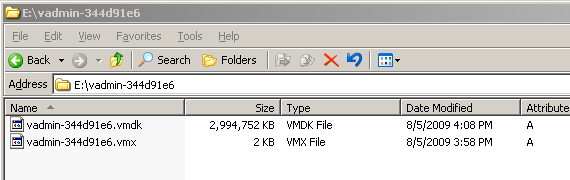
Congratulations, you now have a virtual machine. Try it out to find out how the process went.
~~~~~~~~~~~~~~~~~~~~~~~~~~~~~~~~~~~~~~~~~~~~~~~~~~~~~
Using VMware vCenter Converter 4 to create a Virtual Center Template
February 20, 2009I have a set of standard template Virtual Machines under VMware Workstation 6.5 that I use to spin up VMs, Workstation doesn’t have a native template feature but I get a VM to a point where I’m happy with the build, VM tools installed, Windows updates done etc. and then I sysprep it and shut it down.
At this point I mark it read-only and when I want to create a new Windows virtual machine I just right-click it and create a linked-clone.
This is handy for me as each VM only consumes small amounts of space as they are all just differential snapshots.
however, if I want to change the base template (for example to update from SP1 to SP2) this does present an issue as it has lots of children which depend on it so I can’t change the parent VM, in this instance I create a full clone of the base VM and update it and create further linked clones from it (essentially creating a “fork”).

I also have an ESX server farm in my lab and I like to keep my standard images consistent between workstation and ESX/VC to to save me creating and patching multiple templates.
I recently created the following templates and wanted to get a consistent copy on both my lab ESX system and my laptop VM Workstation system, I noted VMware Convertor 4.0 had been released so thought it would be an ideal time to use it to get a fresh set of images with all the current Windows updates applied.
Note the source machine options.

VM Workstation VM Information

Select appropriate target – in this instance it was an ESX farm, controlled by Virtual Center so I chose VMware Infrastructure Virtual Machine and put the hostname and credentials for my Virtual Center host, you can of course go direct to each ESX host if you don’t have VC.

This is a new feature, you get shown all the VM’s and can choose the appropriate storage group to on each host because it queries VC

It checks it out against the host and VC
Some better laid out options for the conversion (reminds me of the PlateSpin UI)

Options to change CPU count and SCSI controller

Options to customize service start-up options post-conversion, for example if you have an application that you don’t want to start-up until you’ve checked the target VM is ok (not applicable in this case as it’s a vanilla template, but handy to know).

These are the new sync options – and a warning that I don’t have sysprep pre-loaded in this VM – not required at this stage as the VM already has sysprep applied within (will change this once its on the target as i can apply a customization template)

Note – I chose to install VM tools, as the ESX version is likely to be different from my Workstation version that is included in the image.

Usual summary screen… much nicer UI than previous versions

Running the conversion process, this is over a GbE network connection.

Note new job copy option.. very handy in previous versions you had to do it from scratch each time.

All done in about 20mins, although it did sit at 95% 1 minute remaining for about 10mins

And it shows up in Virtual Center as a normal VM

Worth remembering to use the ‘notes’ field in both workstation and ESX, Converter brings them across so you’ll always know this VM’s history

Now, running under ESX

at 1st logon its detecting newly installed hardware drivers and running deploypkg.exe, which I assume converter injected to do post-conversion tasks
The auto-install of VMtools threw up some errors over unsigned drivers, so had to manually ok the dialog boxes and then it rebooted itself, wonder if I hadn’t logged on manually it may have done all this in the background automatically.
Once the VM was across I got a service failure on boot up, after I did some digging, it turns out it is something related to VMware tools the vmhgfs service failed to start due to the following error: Cannot create a file when that file already exists – I guess this is a left over from the Workstation version of VM Tools as a bit of digging revealed that this driver is related to host/guest shared networking which isn’t in ESX. – in this instance I removed the registry key relating to the driver and all was good (do this at your own risk!)

I also had a failed device in device manager, I right clicked on the VMware Replay Debugging Helper and chose uninstall and all was well, maybe I could have uninstalled/reinstalled VM Tools instead.


A reboot and all was running ok, I then shutdown the newly cleaned up VM and converted it to a Virtual Center template and was able to apply my normal customization templates (see this post for more info on that).
Next part of this article will be to convert the Windows 2008 x64 template I have in ESX into a VMware Workstation image and all my templates will be consistent.
At this point I mark it read-only and when I want to create a new Windows virtual machine I just right-click it and create a linked-clone.
This is handy for me as each VM only consumes small amounts of space as they are all just differential snapshots.
however, if I want to change the base template (for example to update from SP1 to SP2) this does present an issue as it has lots of children which depend on it so I can’t change the parent VM, in this instance I create a full clone of the base VM and update it and create further linked clones from it (essentially creating a “fork”).

I also have an ESX server farm in my lab and I like to keep my standard images consistent between workstation and ESX/VC to to save me creating and patching multiple templates.
I recently created the following templates and wanted to get a consistent copy on both my lab ESX system and my laptop VM Workstation system, I noted VMware Convertor 4.0 had been released so thought it would be an ideal time to use it to get a fresh set of images with all the current Windows updates applied.
- Windows Server 2008 x64 as a virtual centre template on my ESX farm
- Windows Server 2003 Ent, x86, SP2 as a read-only VM on VMware Workstation 6.5.
Note the source machine options.

VM Workstation VM Information

Select appropriate target – in this instance it was an ESX farm, controlled by Virtual Center so I chose VMware Infrastructure Virtual Machine and put the hostname and credentials for my Virtual Center host, you can of course go direct to each ESX host if you don’t have VC.

This is a new feature, you get shown all the VM’s and can choose the appropriate storage group to on each host because it queries VC

It checks it out against the host and VC
Some better laid out options for the conversion (reminds me of the PlateSpin UI)

Options to change CPU count and SCSI controller

Options to customize service start-up options post-conversion, for example if you have an application that you don’t want to start-up until you’ve checked the target VM is ok (not applicable in this case as it’s a vanilla template, but handy to know).

These are the new sync options – and a warning that I don’t have sysprep pre-loaded in this VM – not required at this stage as the VM already has sysprep applied within (will change this once its on the target as i can apply a customization template)

Note – I chose to install VM tools, as the ESX version is likely to be different from my Workstation version that is included in the image.
Usual summary screen… much nicer UI than previous versions

Running the conversion process, this is over a GbE network connection.

Note new job copy option.. very handy in previous versions you had to do it from scratch each time.

All done in about 20mins, although it did sit at 95% 1 minute remaining for about 10mins
And it shows up in Virtual Center as a normal VM
Worth remembering to use the ‘notes’ field in both workstation and ESX, Converter brings them across so you’ll always know this VM’s history

Now, running under ESX

at 1st logon its detecting newly installed hardware drivers and running deploypkg.exe, which I assume converter injected to do post-conversion tasks
The auto-install of VMtools threw up some errors over unsigned drivers, so had to manually ok the dialog boxes and then it rebooted itself, wonder if I hadn’t logged on manually it may have done all this in the background automatically.
Once the VM was across I got a service failure on boot up, after I did some digging, it turns out it is something related to VMware tools the vmhgfs service failed to start due to the following error: Cannot create a file when that file already exists – I guess this is a left over from the Workstation version of VM Tools as a bit of digging revealed that this driver is related to host/guest shared networking which isn’t in ESX. – in this instance I removed the registry key relating to the driver and all was good (do this at your own risk!)

I also had a failed device in device manager, I right clicked on the VMware Replay Debugging Helper and chose uninstall and all was well, maybe I could have uninstalled/reinstalled VM Tools instead.

A reboot and all was running ok, I then shutdown the newly cleaned up VM and converted it to a Virtual Center template and was able to apply my normal customization templates (see this post for more info on that).
Next part of this article will be to convert the Windows 2008 x64 template I have in ESX into a VMware Workstation image and all my templates will be consistent.