22 Oct 2009

Sharepoint - How to change the Maximum File Upload Size

How to change the Maximum File Upload Size

By default SharePoint allows a maximum file size of 50MB that can be uploaded into any document library. This might be too much as you might not want users downloading 50MB files over your LAN/WAN. To change the maximum file size
1. Goto SharePoint Central Administration > Configure Virtual Server Settings from Virtual Server List Page.
2. Select your server
3. Goto Virtual Server General Settings (in Virtual Server Management)
4. Change the value of the Maximum Upload Size in MB's.

If you increase the file size limit, your site might occassionally time out for users while they are uploading files. To accomodate this increase the default time out property for IIS.

17 Oct 2009

Virtualize a Windows system with VMware vCenter Converter

Virtualize a Windows system with VMware vCenter Converter

August 17th, 2009 by Luis Ventura
The title should have been transition from bare metal to virtual with VMware vCenter Converter. VMware foresaw the existence of server configurations that were either too complex or labor intensive to be recreated from scratch, that’s why they came up with VMware vCenter Converter. What it does is convert a bare-metal system in to a VMware virtual machine ready to be used.
  • VMware vCenter Converter is available for free from the VMware website.
  • Keep in mind you will need another drive or remote storage to store the new virtual machine.

How-To

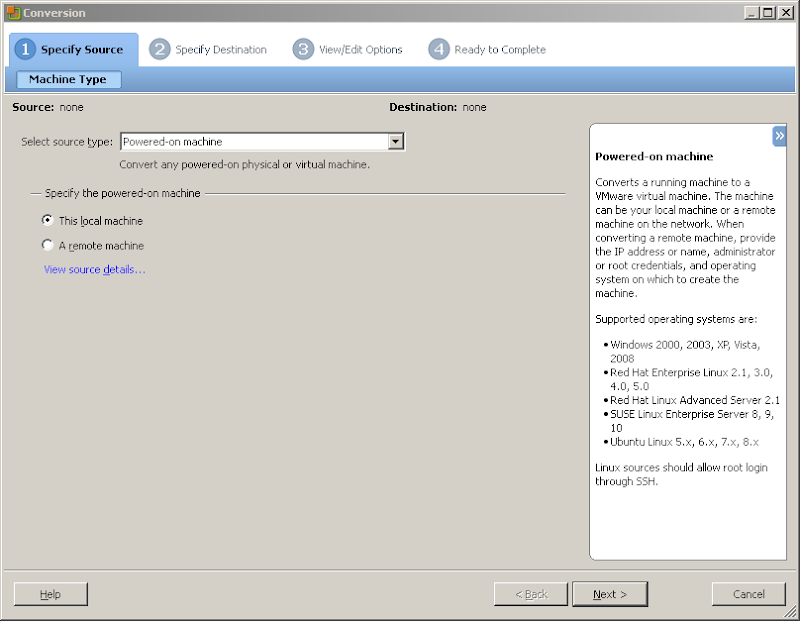
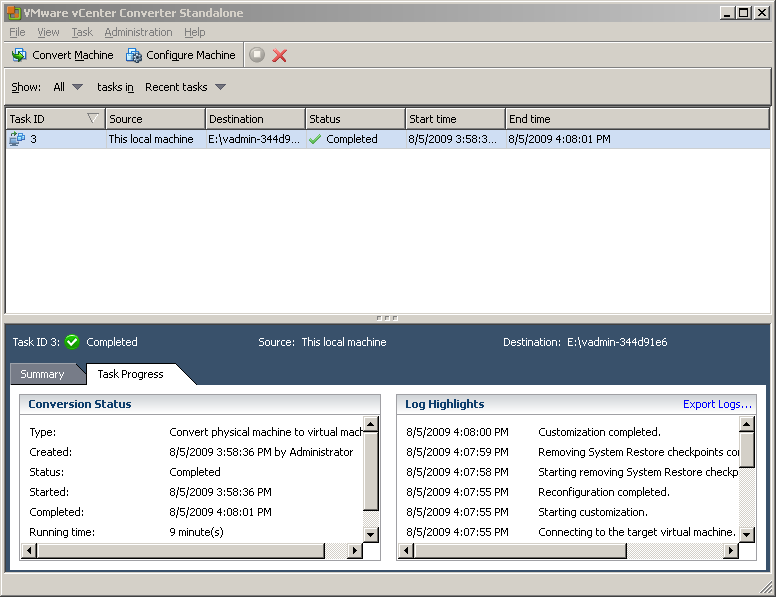
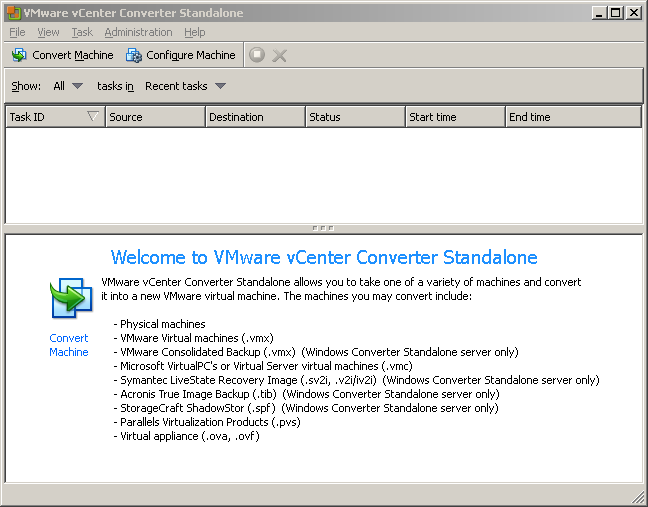
  • Start VMware vCenter Converter and click on Convert Machine.

  • Select source type: – This is where you get to choose the system you wish to convert. I choose Powered-on machine, to convert the local system.
  • Specify the powered-on machine – Obviously, select This local machine.

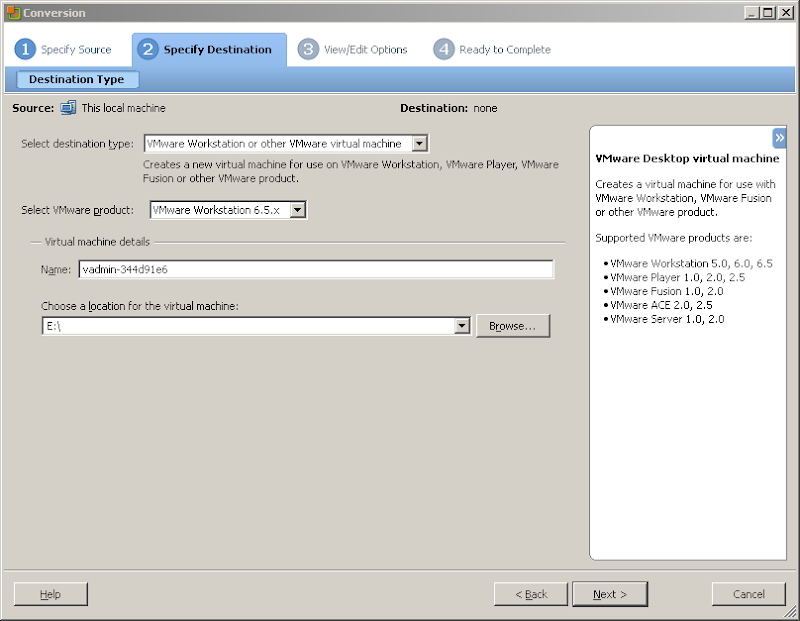
In this window you will need to provide the following:
  • Select destination type – this option will create a virtual machine for use on VMware virtual infrastructure virtual machine or VMware Workstion or other VMware virtual machine.
  • Select VMware Product – Because I selected VMware Workstion or other VMware virtual machine in the option above, I have to specify the version of Vmware Workstation the virtual machine will be compatible with.
  • Name: – Give a name to the virtual machine or use the suggested one.
  • Choose a location for the virtual machine – Select the location where VMware Converter can output the new virtual machine to be created.
  • And then hit Next to continue.
Remember, you need a second disk where VMware Converter can output the virtual machine while it’s being created. You can not use the same disk you wish to virtualize to stored the vm.

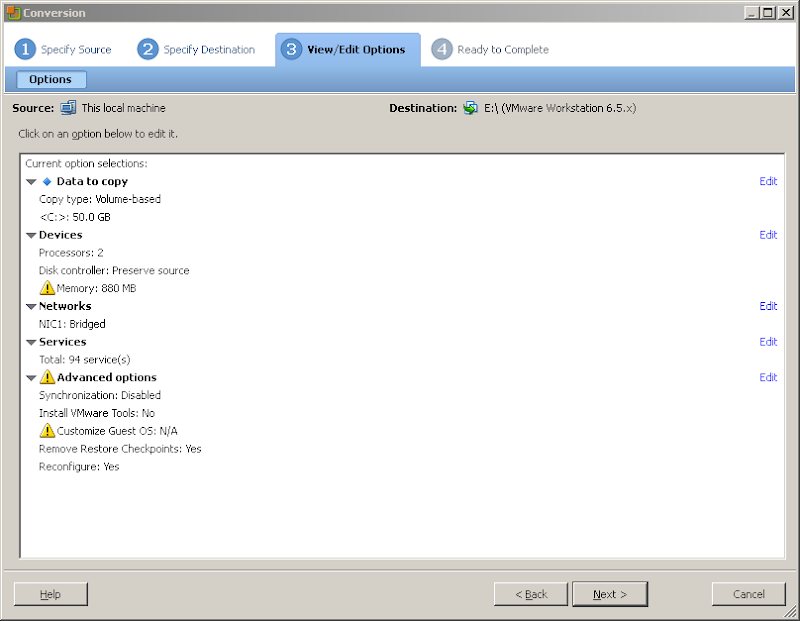
  • In this windows you can change some aspect of the future virtual machine. Among the possible changes you can change: the allocated RAM, number of processors, and number of NICs. If you do not wish to make any changes hit Next to continue.

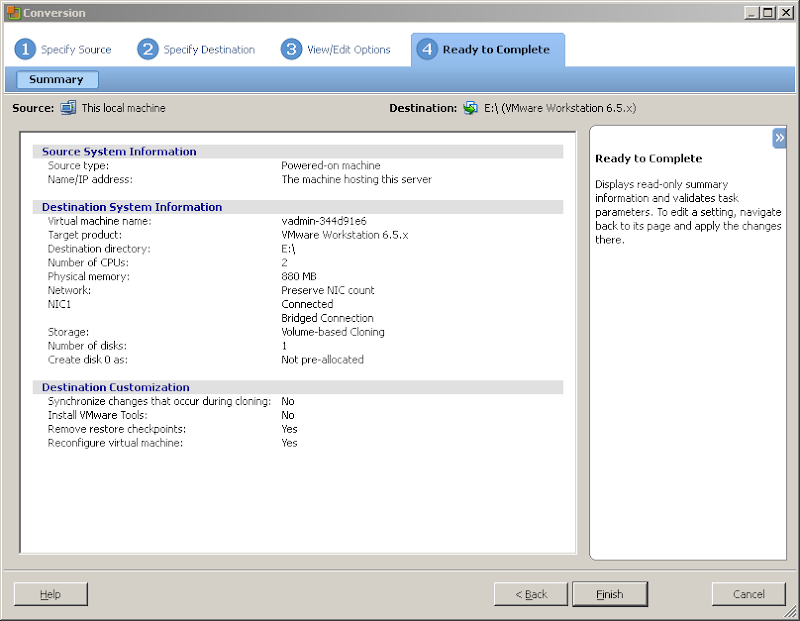
  • VMware vCenter Converter will present with an overview of the setting for the new virtual machine.

  • VMware Converter will present you with a display of the progress being made. Allow for a considerable amount of time for the conversion to complete.

  • After the process is done check on the drive or location where virtual machine was to be stored during the process.

Congratulations, you now have a virtual machine. Try it out to find out how the process went.
~~~~~~~~~~~~~~~~~~~~~~~~~~~~~~~~~~~~~~~~~~~~~~~~~~~~~

Using VMware vCenter Converter 4 to create a Virtual Center Template

February 20, 2009
I have a set of standard template Virtual Machines under VMware Workstation 6.5 that I use to spin up VMs, Workstation doesn’t have a native template feature but I get a VM to a point where I’m happy with the build, VM tools installed, Windows updates done etc. and then I sysprep it and shut it down.
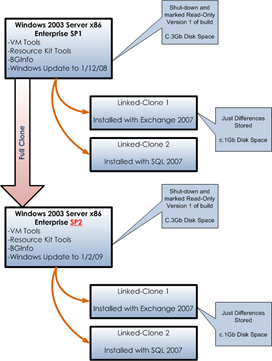
At this point I mark it read-only and when I want to create a new Windows virtual machine I just right-click it and create a linked-clone.
This is handy for me as each VM only consumes small amounts of space as they are all just differential snapshots.
however, if I want to change the base template (for example to update from SP1 to SP2) this does present an issue as it has lots of children which depend on it so I can’t change the parent VM, in this instance I create a full clone of the base VM and update it and create further linked clones from it (essentially creating a “fork”).
image
I also have an ESX server farm in my lab and I like to keep my standard images consistent between workstation and ESX/VC to to save me creating and patching multiple templates.
I recently created the following templates and wanted to get a consistent copy on both my lab ESX system and my laptop VM Workstation system, I noted VMware Convertor 4.0 had been released so thought it would be an ideal time to use it to get a fresh set of images with all the current Windows updates applied.
  • Windows Server 2008 x64 as a virtual centre template on my ESX farm
  • Windows Server 2003 Ent, x86, SP2 as a read-only VM on VMware Workstation 6.5.
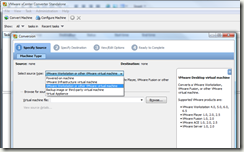
1st task is to import the Windows Server 2003 image from Workstation to ESX/VC using VM Converter 4.0;
Note the source machine options.
image
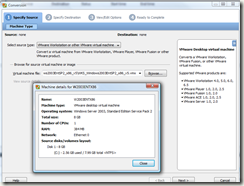
VM Workstation VM Information
image
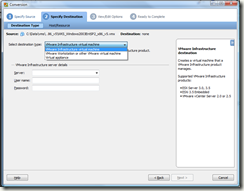
Select appropriate target – in this instance it was an ESX farm, controlled by Virtual Center so I chose VMware Infrastructure Virtual Machine and put the hostname and credentials for my Virtual Center host, you can of course go direct to each ESX host if you don’t have VC.
image
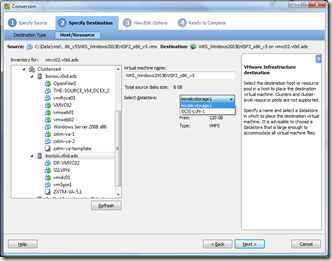
This is a new feature, you get shown all the VM’s and can choose the appropriate storage group to on each host because it queries VC
image
It checks it out against the host and VC image
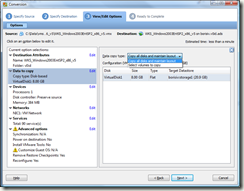
Some better laid out options for the conversion (reminds me of the PlateSpin UI)
image
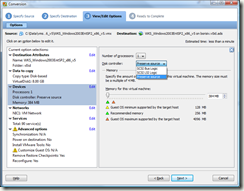
Options to change CPU count and SCSI controller
image
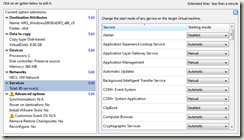
Options to customize service start-up options post-conversion, for example if you have an application that you don’t want to start-up until you’ve checked the target VM is ok (not applicable in this case as it’s a vanilla template, but handy to know).
image
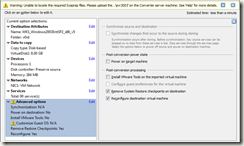
These are the new sync options – and a warning that I don’t have sysprep pre-loaded in this VM – not required at this stage as the VM already has sysprep applied within (will change this once its on the target as i can apply a customization template)
image
Note – I chose to install VM tools, as the ESX version is likely to be different from my Workstation version that is included in the image.
image
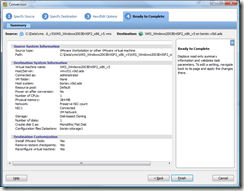
Usual summary screen… much nicer UI than previous versions
image
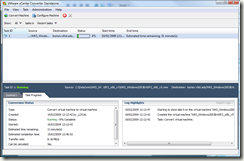
Running the conversion process, this is over a GbE network connection.
image
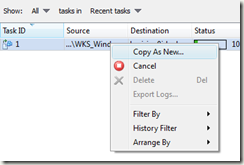
Note new job copy option.. very handy in previous versions you had to do it from scratch each time.
image
All done in about 20mins, although it did sit at 95% 1 minute remaining for about 10mins :)
image
And it shows up in Virtual Center as a normal VM
image
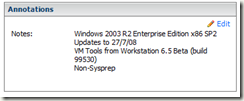
Worth remembering to use the ‘notes’ field in both workstation and ESX, Converter brings them across so you’ll always know this VM’s history
image
Now, running under ESX
image
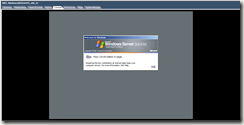
at 1st logon its detecting newly installed hardware drivers and running deploypkg.exe, which I assume converter injected to do post-conversion tasks
The auto-install of VMtools threw up some errors over unsigned drivers, so had to manually ok the dialog boxes and then it rebooted itself, wonder if I hadn’t logged on manually it may have done all this in the background automatically.
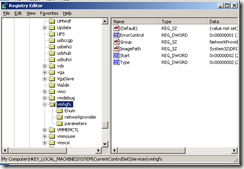
Once the VM was across I got a service failure on boot up, after I did some digging, it turns out it is something related to VMware tools the vmhgfs service failed to start due to the following error: Cannot create a file when that file already exists – I guess this is a left over from the Workstation version of VM Tools as a bit of digging revealed that this driver is related to host/guest shared networking which isn’t in ESX. – in this instance I removed the registry key relating to the driver and all was good (do this at your own risk!)
image
I also had a failed device in device manager, I right clicked on the VMware Replay Debugging Helper and chose uninstall and all was well, maybe I could have uninstalled/reinstalled VM Tools instead.
image
image
A reboot and all was running ok, I then shutdown the newly cleaned up VM and converted it to a Virtual Center template and was able to apply my normal customization templates (see this post for more info on that).
Next part of this article will be to convert the Windows 2008 x64 template I have in ESX into a VMware Workstation image and all my templates will be consistent.

15 Oct 2009

How to view email header

http://128.175.24.251/headers.htm
AOL Email The email files are in an html format. The objective is to save the file in html format. This can be done as follows:

Open the email message you want to save, as if you were reading it - Near the top, at the bottom of the To: / From: section, click on "Details" to reveal the header. (you could simply copy and paste this information also)
Move mouse cursor to the top tool bar, click on "File"
Move mouse cursor to "Save as..." and click.
Identify which directory you would like to save the file in. This is done using the normal save function of Windows. If you are not real comfortable with directories, save the file in "Desktop". This will have the file icon visible on you regular desktop screen and very easy to find later on.
Provide a name of the file in the "file name" box.
Select the "type" as "html" if possible. If your browser does not show "html" type, just select the type as "All Files" and add ".html" to the file name generated in step 6, such as email.html. The "dot" before the html extension is important. The objective of this step is to have the extension of the file as an "html" type file.
Press "Save".
To forward the file to someone else (law enforcement, lawyer, ISP):

Move cursor to the top tool bar and click on "Write"
Insert the email address you want to forward the file to
Type any info in the body of the message, if needed
To add the html file you just generated in the above steps, click on "Attachments"
When the "Attachments Window" opens, click on "Attach"
Find the file in the directory window and highlight the file name. If you followed the "Desktop" instructions, the directory name is "c:\desktop". If there are too many files that appear, type "*.html" in the file name. The use of the asterisk (also called a star by some) lists all files that are html.
Click on "open"
Click on "OK"
Click on "Send now"
The message and attached file have now been sent.
Please be aware that AOL only keeps messages in your INBOX for two weeks, unless you save it as NEW or save it in a separate folder in your AOL directory on your computer.

Additionally, a screen name of TOSEMAIL1 has been identified as a source of help for unacceptable email in the AOL system. Just enter tosemail1 in the "send to" screen. If you are outside of the AOL environment, the address is tosemail1@aol.com.
Compuserve The default option is that full headers appear at the BOTTOM of each received message.
Eudora Pro When reading an email message, look at the toolbar just above the message itself. There should be a button that reads
BLAH
BLAH
BLAH
in black and white. Click on this and the full headers will appear. Then select all, copy and paste into a new message to send to the offender's ISP, or click on the forward button and the full headers will automatically be placed in the new email message.
Excite Webmail View the message
Use the "save to disk" option
Open the message's text file with your favorite text editor (notepad)
Copy the message from the text editor
Free Agent/Agent Click on MESSAGE, then "Show Full Headers." Go to the message, click inside the message pane, COPY, then PASTE to a text file or forward the message to yourself or to the appropriate ISP.
Hotmail Go to Options
Go to Preferences
Scroll down to Headers, then click on Advanced Headers
Return to University of Delaware Police cyber crime help home page
Juno Version 4+ On the drop down menu "Options", choose "Email Options.." (press ctrl-E) Under "Show Message Headers", select the "full" option. Click the OK button to save the setting.
Juno version 4+ can display MIME and HTML email, but does not provide a way of Viewing the HTML Source for the message within Juno.
To get the full source, including HTML codes:
In the Juno mail client, click "file" and then "Save Message as Text File.." (ctrl-T).
Give the file a name which you will remember (many people save temporary files to the desktop).
Double-click on the resulting file.
Lotus Notes 4.6 (Win 9x client) Open the properties box on the message (in the default installation of the Notes Client, it will be the first smart icon on the left, but you can also right-click on the document and choose properties from that menu)
Choose the second tab on the properties box, which is a list of fields and their contents
Scroll down to the field "$additionalheaders."
Select the contents of the field and hit Ctrl+C to copy them to your clipboard
Open a new email message, put your cursor in the body of the message, and hit Ctrl+V to paste the headers there
If Notes will not permit you to select the contents of the field, you'll have to manually copy them to a new message - please be very careful in doing so.
Microsoft Exchange To read (and copy) the header using Microsoft Exchange, do the following:
Open the message in Exchange to view it. Choose "File," then "Properties," then "Internet." The header will be visible and will be highlighted. Simply right click and copy it. Then paste on the front of the message and forward it to your abuse department.
Microsoft Internet Explorer I just stumbled onto a way to attach the full header to a message.
Choose "Properties" under "File". Click on the "Details" tab. This will show the full header.
Now right click and choose "Select All". Right click again and choose "Copy". Start a new message, right click again, and choose "Paste". This will paste the entire header into this new (and temporary) message. Copy the header from the new message and paste it back onto the original. The paste command doesn't work directly on the original message.
This isn't elegant, but it seems to work.
Microsoft Internet News
For those people who use Microsoft's Internet News, simply (while viewing the message) click on File, Properties, then click on the Details tab. Sending complaints to root@someisp.com will also work. Some other addresses are support@, webmaster@, and newsmaster@
Microsoft Outlook 98, Outlook 2000, Outlook 2003 Open the message and select View, then Options from the drop-down menus.
Near the bottom of the screen you'll see a section titled INTERNET HEADERS.
You can copy the headers and paste them into an email elsewhere to get them to the proper people.
Microsoft Outlook 2007 Double click on the email message so that it is open in its own window. Outlook 2007 uses a watered-down version of Word 2007 as the email editor and with it comes the new ribbon user interface. Thus, the "Options" feature is no longer under "View", as with previous versions of Outlook, and takes some hunting to find it, but it is there. It is on the "Message" tab, in the "Options" block, which is the fourth block over. To the right of "Options", there is a little button with an arrow in it. Click on it and you have the message options menu with the internet headers in the bottom section. Select this information and copy/paste it as needed.
If you don't have the message yet open, which is better yet, and you wish to see the header, right click on the message in your inbox and choose "Message Options". You will be looking at the headers at this point.
Microsoft Outlook Express 5 There's an even easier solution to expanding Microsoft's Outlook Express 5 headers so that you can copy and paste it to another window:

Right click on the message and select Properties.
Choose the Details tab and select the Message Source Button.
Select All (CTRL + A) and Copy (CTRL + C).
Close the Message Source window and the Properties window.
Select New Mail and position your cursor in the body of the email.
Paste (CTRL + V) the copied information.
Send the email to the ISP where the SPAM/UCE originated from.
Additional Method

Here's a tip to simplify the process of getting full headers when using Outlook Express 5 and Windows 98 (don't know about other versions of OE)

Instead of selecting the message, right-clicking properties, clicking details, then message source, simply select the message and press Ctrl-F3. Then press Ctrl-A followed by Ctrl-C. (Ctrl-F3 takes care of all the steps necessary to get to the full header. Ctrl-A selects all the text and Ctrl-C copies it to the clipboard.)

Now start a new message or just forward the original message (which takes less time than opening a new one) to the originating ISP.
Return to University of Delaware Police cyber crime help home page
Mozilla Thunderbird To read the email headers in the Mozilla Thunderbird email client, simply open the email. On the menu bar, go to View | Headers and select "All". The headers are immediately displayed. The menu choices and the results are shown in this hyperlinked image.
Netscape Messenger To read the email header in Netscape Messenger (the email reader supplied with Netscape communicator) press Ctrl-U. A new window will open with the full message including the complete header. To copy this to a email message press Ctrl-A to highlight the entire message then Ctrl-C to copy it. Open the email message you want to send. Using the mouse, place the cursor in the body of the message, select edit / paste as quoted, from the menu bar.
Netscape News I found a simple way to view the headers of news spam in Netscape. Simply click View-> document source when you're looking at the offending item. The full headers are then visible.
Newswatcher If you want the full headers on Newswatcher, go to File, choose Preferences, and check the Show Article Headers box.
Operamail Choose Options and enable [x] Show Message Headers in Body of Message
Pegasus In Pegasus, just hit Ctrl-H (or the backspace key) while reading a message. You will see the full headers.
Do this *before* hitting "F" (for Forward), and the full headers will be forwarded, too.
(True for Pegasus 2.53, at least)
Pine You must configure Pine to allow showing message headers. You may skip steps 1-3 below if you have performed this configuration.

>From the main Pine menu, type S for Setup, then C for Config.
Use the space bar and down arrow to scroll until you reach the option [ ] enable-full-header-cmd, then type X in the box to toggle the option on.
Type E to exit Config, and Y to save changes.
The next time you read a message, type H and the full headers will be displayed at the top of the message. Type H again to hide the headers.
Unix I think I've figured out one way of of getting the full headers on Unix. We received a spam and the message had just the usual "from," "to," "date," "subject" headers. But when I saved the message in a directory, then used the "type" command or printed it out, full headers magically appeared, showing where they were really posting from.

Another Tip:
Some more header info for some Unix mail programs.
Nearly nobody uses mail and mailx any more, but they're available on almost all UNIX systems, so let's start with those. You can exit your current mail program without changing the mailbox and then look at the mail message using mail or mailx.
Showing a mail message with the Print or P command displays all of the header lines. Note capital P -- it's important.
Saving the current mail message with the saveretain command saves all of the header lines. (On some systems, Save or S -- note the capitals! -- does this too).
There are lots of other mail readers; the one I use is ELM. In ELM, you display the headers for the current message with the H command.
WebTV While viewing the email, hit "Forward" on the sidebar. Address the document to yourself. Completely erase the subject line.
Put your cursor on the first line of the "body" (text area); Hit "Return" (enter) twice. Your cursor should now be on the 3rd line of the text area.
Type any "Alt" character on this line; DO NOT HIT "RETURN"
Cut and Paste the "Alt" character onto the subject line: (CMD+"A"), (CMD+"X"), (CMD +"V") The "Alt" character should "jump" down to the message text-area.
Hit "Send"; open the received mail.

13 Oct 2009

Black & White List - Chặn cuộc gọi dành cho Blackberry - Free

Default Black & White List - Chặn cuộc gọi dành cho Blackberry - Free

Bạn đã bao giờ bị 1 người lạ dội bom điện thoại lúc 12h chưa. Hoặc lo lắng trong lúc để Profiles là im lặng người iu gọi đến mà không có chuông thì .

Giải pháp thứ nhất: Mua phần mềm, tốn 1 chút phí
Giải pháp thứ 2: Tận dụng sức mạnh của Blackberry, không mất phí.


Bài viết dưới đây sẽ hướng dẫn bạn dùng cách thứ 2

Giới thiệu qua về Profiles trong Blackberry

Như đã biết, Profiles của Blackberry chia làm nhiều tùy chọn
  • Loud: Chuông to
  • Vibrate: Chỉ có rung
  • Quiet: Im lặng là vàng
  • Normal: Cả rung lẫn chuông
  • Phone only: Chỉ có chuông khi có cuộc gọi đến, Sms.. đều bị chặn

Ngoài ra bạn có thể tạo các Profiles mới

Vào Advanced--> Nhấn menu--> New Profiles

Phần 1: Chặn toàn bộ cuộc gọi

Giả sử tôi tạo 1 Profiles là đang bận, khi có người gọi tới thì sẽ tự động báo bận - Cám ơn anh Paloma đã chỉ em phần này

Bạn sẽ thấy 1 loạt danh sách như Phone, Messenges, SMS text.
Ở đây mục đích chính của tôi là chặn hết cuộc gọi, nên sẽ vào phần Phone.

Bạn sẽ thấy 1 mục là Do not Disturb - Chức năng này sẽ tự động báo bận mỗi khi có cuộc gọi tới
Chọn Do not Disturb là Yes

Sau đó chọn menu, Save. Và đặt tên cho Profiles là Dang ban

Bây giờ, khi muốn yên tĩnh chỉ cần chọn Profiles này là người khác khi gọi đến sẽ báo bận

Phần 2: Black & White List

Tình huống đặt ra là bạn đang bận, bỗng nhiên có 1 kẻ quấy rối nháy máy cho bạn. Bực mình quá nên bạn để chế độ im lặng.
Nhưng trong lúc đó, sếp gọi điện bàn công chuyện. Tất nhiên là bạn bị lỡ cuộc gọi này.
Với Blackberry bạn sẽ giải quyết rất nhanh chóng bằng Exception
Đây là 1 tùy chọn cho phép bạn tạo ra những tùy chọn cho từng số điện thoại cụ thể mà không phụ thuộc vào Profiles đang dùng.

1, Blacklist

Tạo Exception mới

Vào Advanced--> Nhấn menu--> New Exception

Đặt tên cho Exception này
Ở ô From, nhấn Trackweel để chọn Menu-->Add Name
Sau đó chọn số cần chặn từ danh bạ
Ở phần Profiles chọn Profiles Đang bận - Đã tao ở trên

1, White List
Làm tương tự như Blacklist. Nhưng để Profiles là Normal


~~~~~~~~~~~~~~~~~~~~~~~~~~
Trich cua ban Tinhvi@tinhte.com
8 Oct 2009

Linksys PAP2T

PAP2T Commands:

73738 Factory reset
**** Enter interactive voice response menu
100 Check DHCP
101 Enable/Disable DHCP
110 Check IP Address
111 Set static IP
120 Check network mask
121 Set network mask
130 Check static gateway IP address
131 Set static gateway IP address
140 Check MAC
150 Check firmware version
732668 Manual reboot

Total Pageviews